
In my previous post, 5 Ways to Make Your Instagram Feed More Cohesive, I spoke about how you can create a beautiful insta-worthy feed that would impress any potential client. Today, I want to go over the exact apps I use to edit my photos before posting to social media. So let’s dive right into The Only Three Apps You’ll Ever Need to Edit Instagram Photos!
#1. Adobe Lightroom Photo Editor
We already touched on this in my previous post, but today I’m going to dive a bit deeper and explain my favorite features of the Adobe Lightroom app I use quite often.
1. Presets – Lightroom presets allow you to apply a set of edits and effects to a photo with just one click. Below is an example taken from my app:
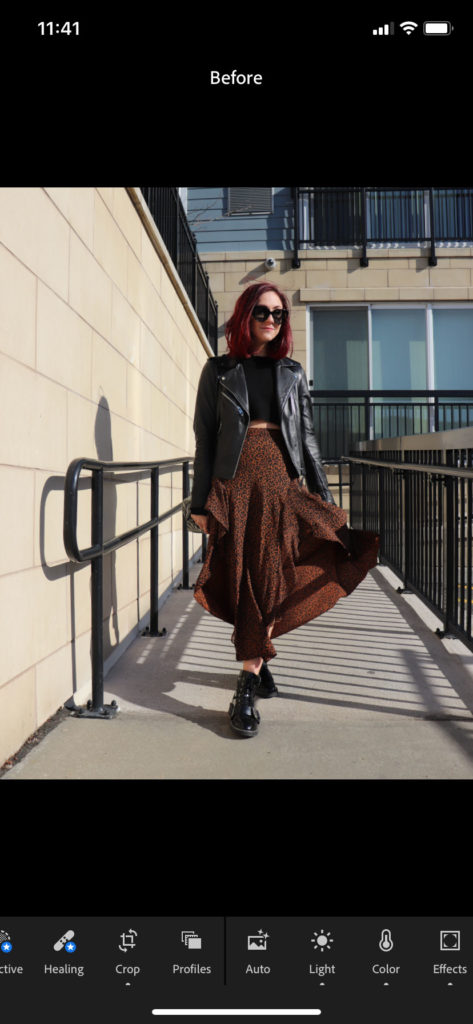
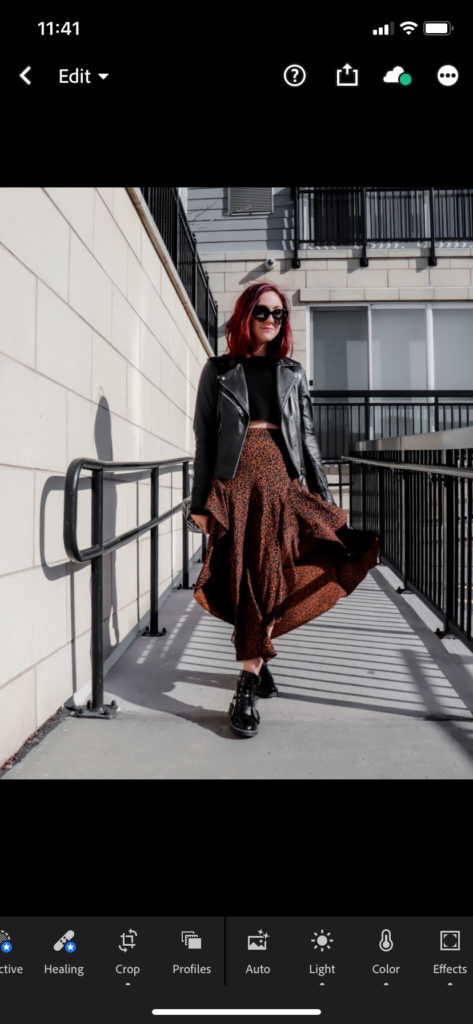
My photo was taken on a sunny day, which casted a yellow light on the surrounding buildings (left photo). Since my Instagram feed is pretty neutral, I found a preset that desaturates yellows, blues and greens. On the right, you can see what a difference this slight adjustment can make on the entire photo! It’s amazing, right?
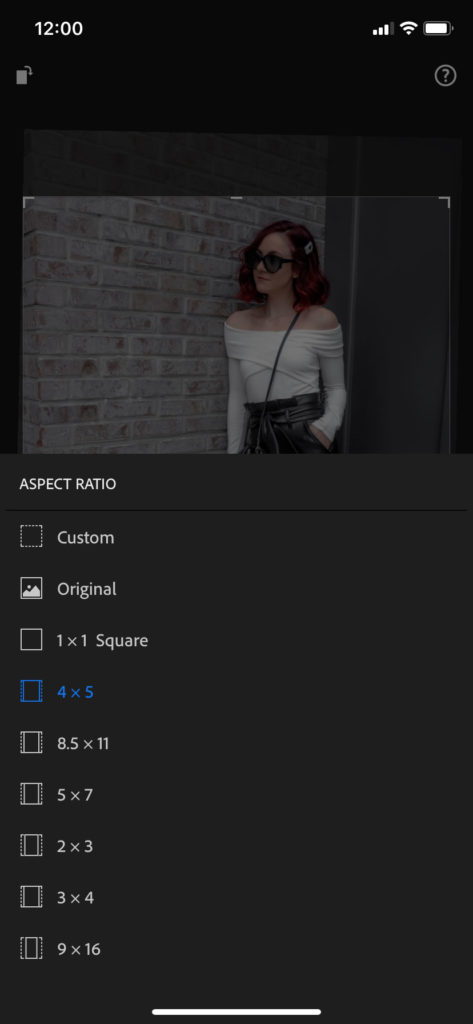
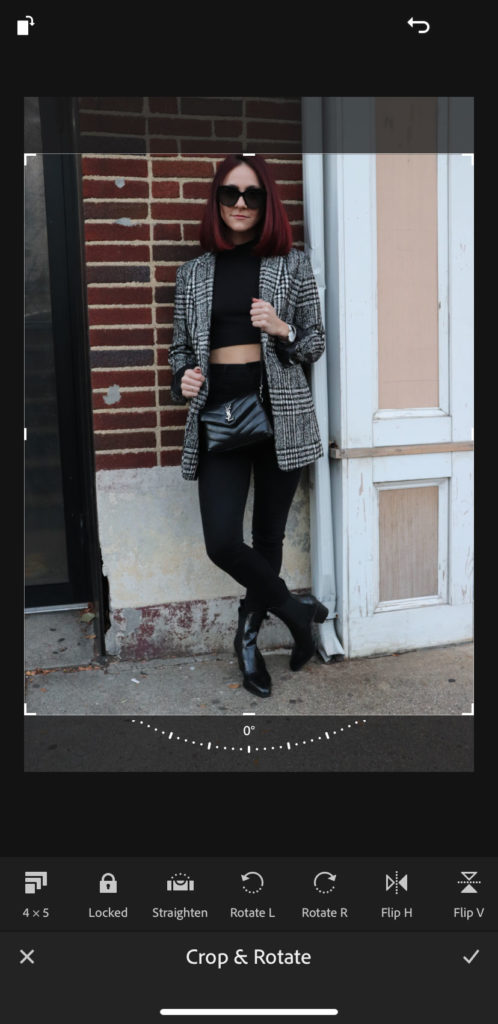
2. Advanced Crop Tool – Lightroom has a great cropping tool which allows you to instantly crop your photo to perfectly fit different social media apps! For example, I use the 1×1 Square and 4×5 ratio for Instagram. *4×5 is the rectangular ratio Instagram allows us to post.
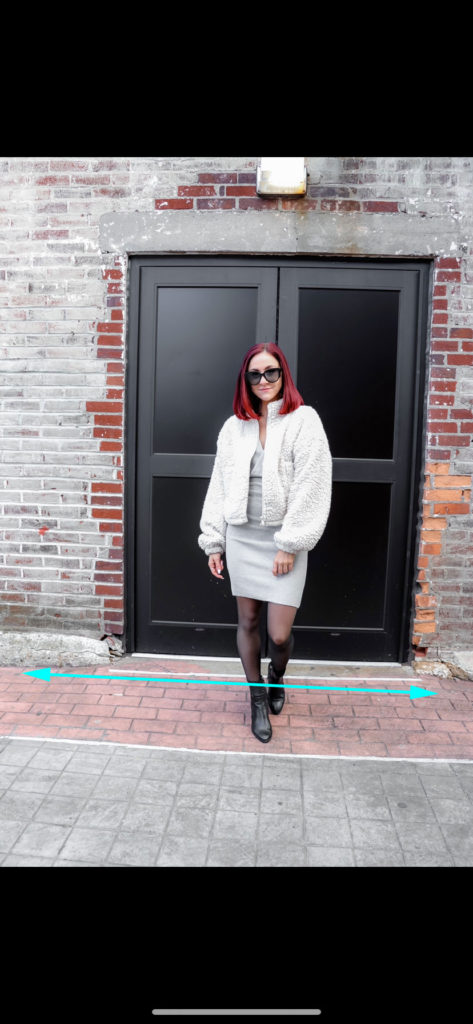
3. Auto-Straightening Capability – Another one of my favorite features is Lightroom’s “straighten” tool. I always use this to edit Instagram photos, and it really takes your photography quality up a notch. I can’t tell you how many poorly shot photos I’ve seen posted to Instagram. All it takes is one click to simply straighten the photo to be at the correct angle. Here’s a great example taken from the app:
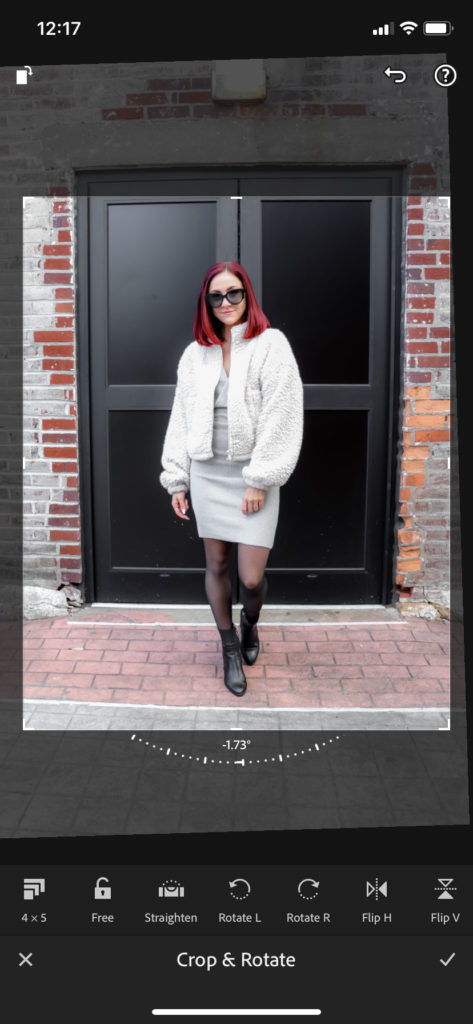

As you can see the first photo was taken at a very crooked angle. The straighten tool automatically straightened the image for us (shown in middle). From here, you can toggle even further to manually adjust the degree. The last photo is my final image after straightening. What a difference, right?
#2. Square Fit Photo Video Editor
I only use Square Fit for the main feature, which pretty much “fits” your image into a specific dimension. This is different than the crop feature in Adobe Lightroom, and I’ll show you why.
Although the Lightroom advanced crop tool works 90% of the time, sometimes Instagram chops too much of the background out, or I end up clipping the top of my head or feet out of the image. I’m sure most of us have experienced this before, but let me a show you a visual . . .
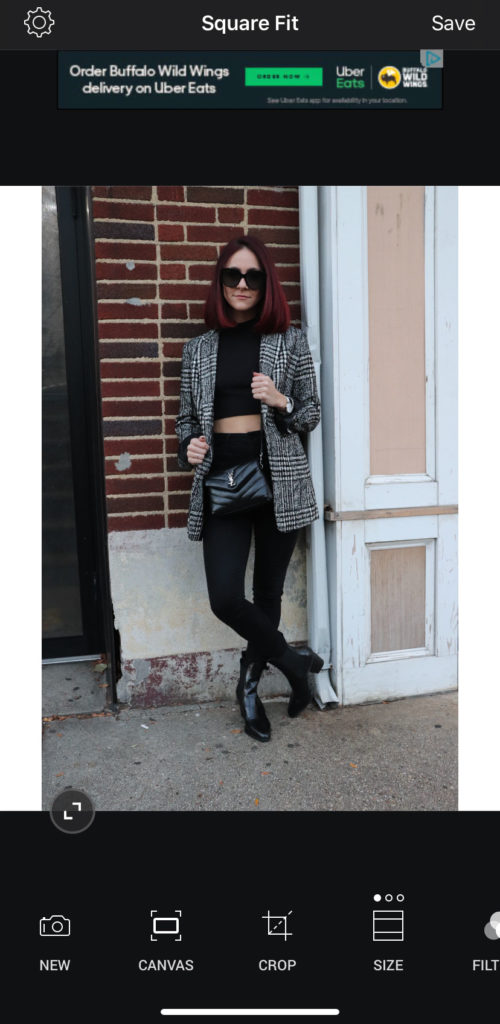
If you take a look at the first image, my head is nearly chopped off when I try to crop at the 4×5 Instagram ratio in the Lightroom App. On the other hand, the Square Fit app takes the 4×5 ratio and pulls the image back to “fit” into this shape. It added white on both sides of the image to make up the space it needs to be a perfect 4×5. Do you see the difference?
Now I know what you’re thinking. What do you do about those white bars on the sides? Well, that takes us to the last app I use to edit Instagram photos!
#3. Adobe Photoshop Fix
1. Spot Heal Tool – This is my favorite feature in the Adobe Photoshop Fix app! With this tool you can remove blemishes and unwanted objects in the background, as well as add to the background! Let me further explain . . .
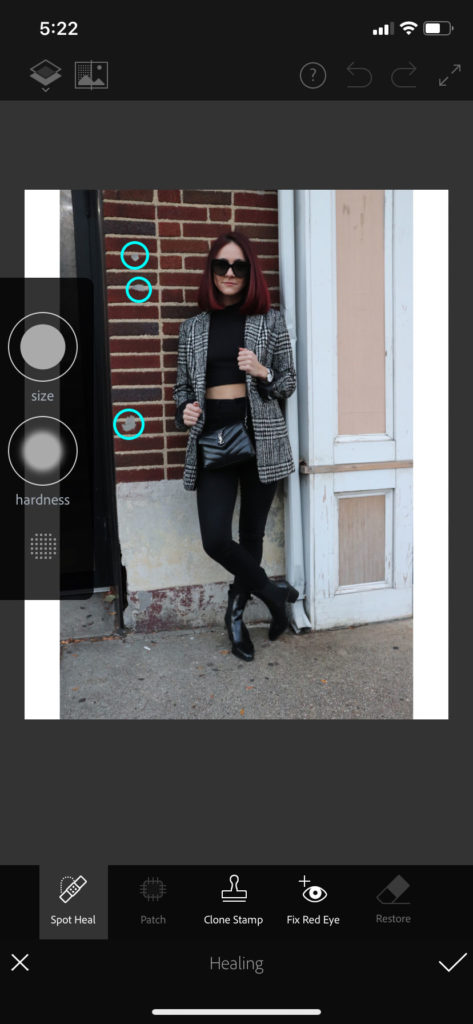
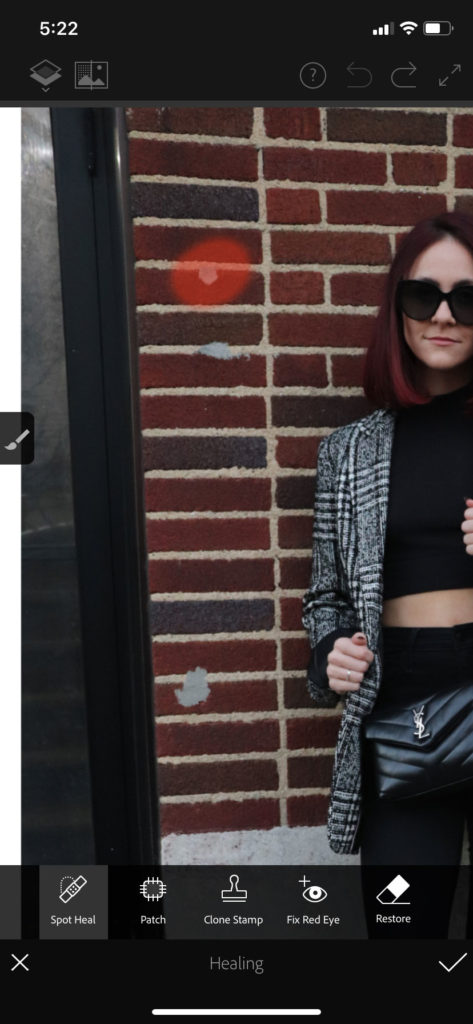
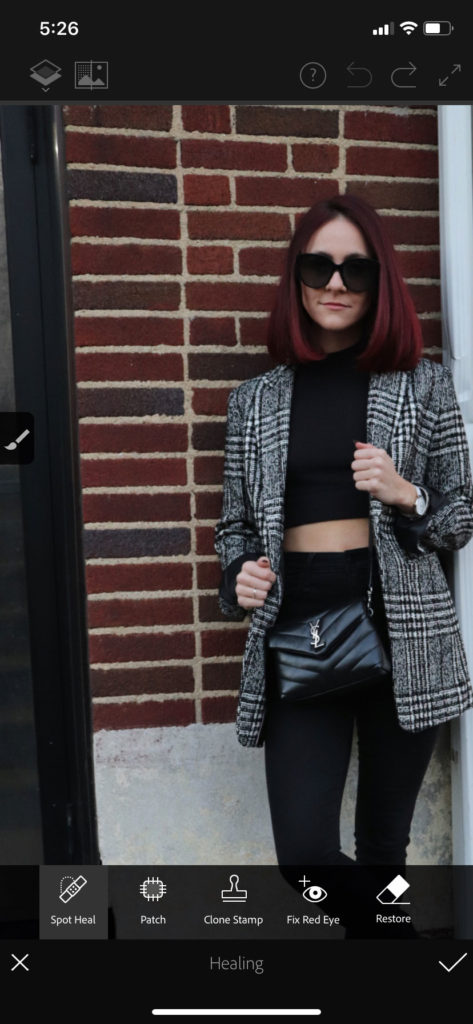
Take a look at the first photo. Notice the marks on the wall behind me (circled in blue). The spot healing tool makes it super easy to erase them! In the second photo I’m using the spot heal tool to isolate the areas I want removed. The final result is shown in the last photo. It’s almost as if the spots weren’t even there to begin with. See how easy that was?
Now that we’ve gone over how to remove things from photos using the spot healing tool, I’m going to show you how I use this tool to “add” to photos. Let’s go back to my original picture from the Square Fit app (with the white bars on either side).
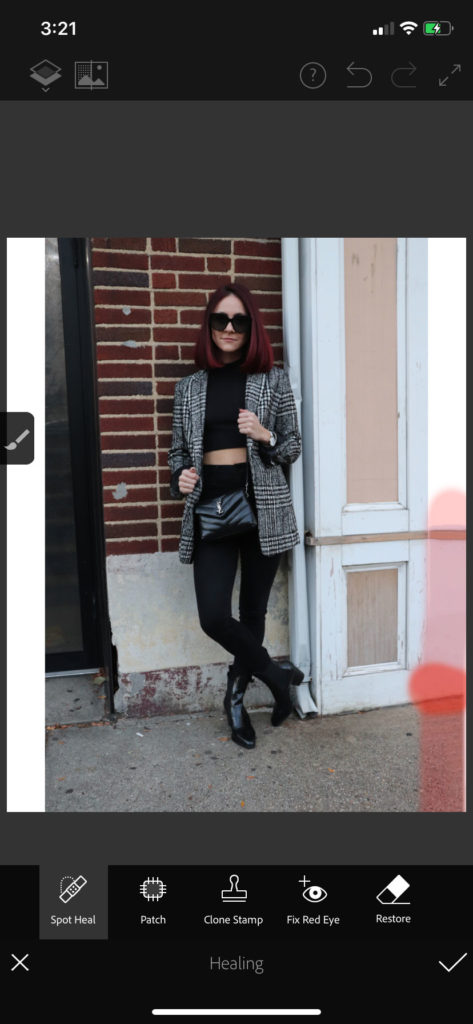
The first photo is how we ended with the Square Fit app. Notice the white bars on each side after we converted this image to be a 4×5 ratio. I don’t like how the white bars look, so I’d like to “add” to the photo and extend the background on both sides on top of the white.
After bringing this image into Adobe Photoshop Fix, I start to use the spot healing tool on the white areas of the image. This is a smart tool, meaning it automatically suggests what should be there. Take a look at the images below as I continue using this tool on the remaining white area:

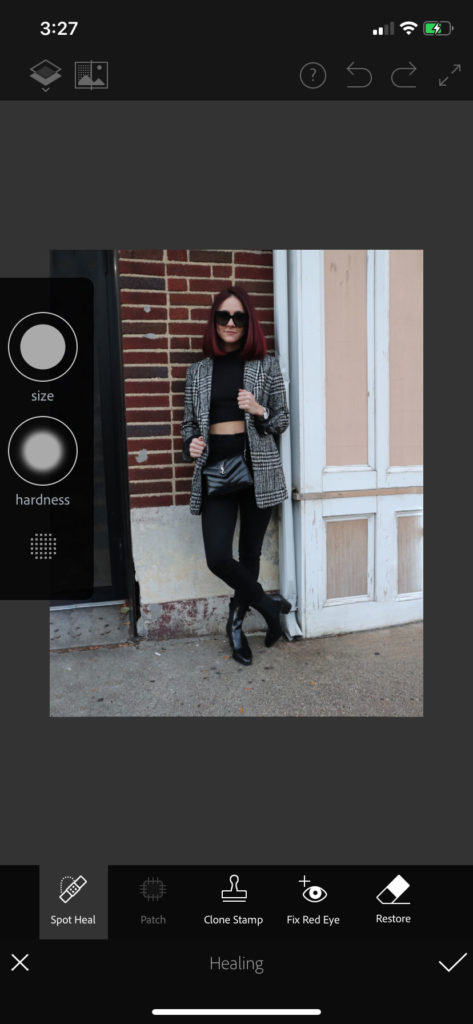
The first photo here is showing the spot heal tool in work. The second photo shows my final result. I now have a perfectly cropped photo in 4×5 ratio without loosing important parts of the photo. Not bad, huh?
2. Smooth Tool – Before I begin, I want to share my opinion on something I know will be brought up, so let’s get this over with.
“I don’t believe in photoshopping or retouching my face or body in photos to show an unrealistic projection of myself.”
-Michelle Russo @andsimplethings
My personal opinion when I edit Instagram photos is: I get it. Life happens. Sometimes you get an unwanted pimple on shoot day, or a strand of hair flies into your face at the very last second. This is the extent of any retouching done on my pictures. I believe in improving the quality of the photo itself, and making minor adjustments for an overall professional result.
Getting back to the smooth tool. . .
This is another one of my favorite features I use regularly in Adobe Photoshop Fix. This tool is great for smoothing out faces in your photos without looking like you applied a heavy snapchat “pretty girl” filter. I like to use the smooth tool to help smooth out any weird shadows, lines, or pixelation on the face. Here’s an example of the tool in work:
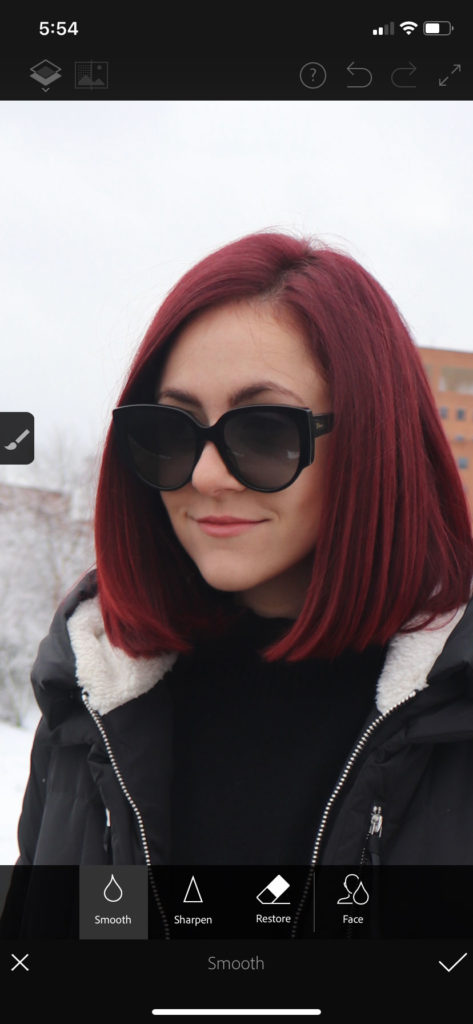

Notice my face in the first photo is a bit grainy, and there are stray hairs across my forehead. Because the photo was taken on an overcast day, there aren’t many shadows to tackle, but the clarity can definitely be improved. The second photo shows the final result after the SMOOTH > FACE tool was applied. My skin color looks even and clear, the stand of hair across my forehead is lightened, and overall the face appears sharper. Although this tool can be used to improve any area of the photo, I personally use it to improve the look of faces + skin.
3. Paint Tool – I don’t use this tool very often, but when I need it, it’s amazing. Most of my color-correcting is done in Lightroom, but sometimes I need to go back in and further adjust.
For example, the Lightroom preset I use for Instagram slightly desaturates the color blue. Depending on the photo, I may not want blue taken away in certain areas (ie. the sky, denim fabrics, and water). Here’s an example of how I can use the paint tool’s brush to isolate and enhance only certain areas of the photo.
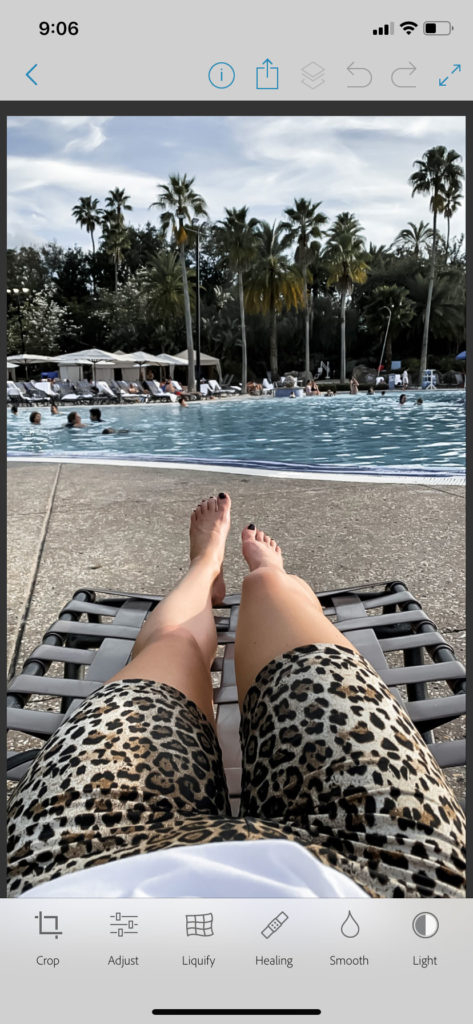
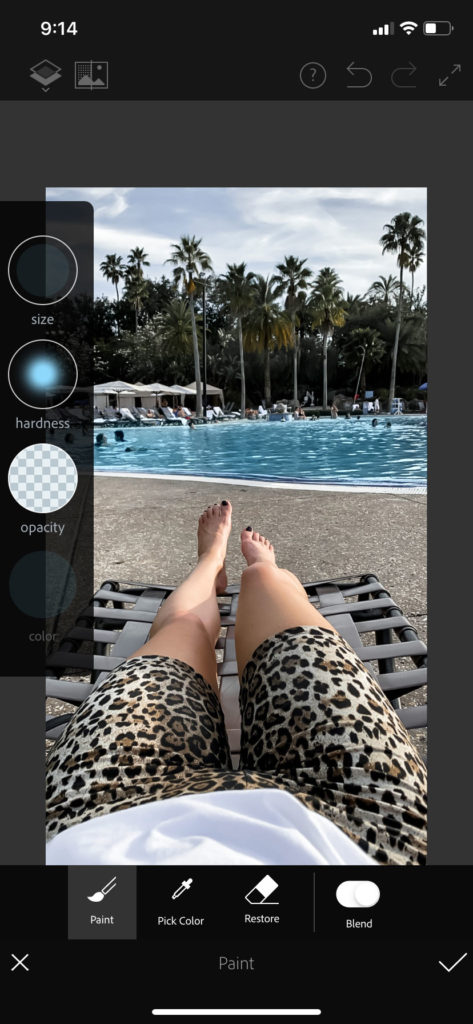
Notice in the first image: the blue color in both the sky and the pool has been taken down significantly using my Lightroom preset. Although it was a cloudy day, the pool’s water was still bright when I took the photo. In the second picture, I used the paint tool to brush on a slightly brighter blue color on top of the water.
Do you see how this tool can be extremely helpful? Some ways to use this feature off the top of my head could be fixing skin tones (when your face doesn’t match the rest of your body due to lighting), bringing back the true color of clothing if your Lightroom preset changed it too much, or even making a cloudy day appear less dingy. There are endless uses for this tool!
And there you have it.
The only three apps you’ll ever need to edit Instagram photos! These are legitimately the only applications I use to edit my photos before posting to social media. I’ve tested tried many different apps and editing software, but I keep going back to these three each time.
All of the features I talked about today are included with the free version of the app. You don’t need to pay big bucks or own a professional photo software to make your photos look great.
I really hope you all enjoyed my second design blog post! I’m going to keep these helpful tips and tricks posts coming, so stay tuned!

/ / As always, this is my personal blog. This blog post is not sponsored. Any views or opinions represented in this blog are my own and do not represent the views of any company or individual I may mention. This post may contain affiliate links where I make a small commission if you click and shop using my links. It won’t cost you a penny, but helps keep this blog running!


Leave a Reply